Water vapor moves through walls, roofs, floors, and slabs whether anyone wants it to or not, and a vapor barrier is the layer that stops it. That is what a vapor barrier does in practice.
Builders put it on the side of the insulation that stays warm in winter, matched to the direction of vapor drive for the climate zone. Code rates it in perms rather than R-value.
The International Code Council’s 2021 residential code sets the line at 0.1 perm or less, tested under ASTM E96. Anything looser gets called a vapor retarder instead.
What Is a Vapor Barrier?

Any building material with a low permeance rating that keeps water vapor from diffusing through a wall, roof, floor, or slab assembly qualifies.
The job is narrow. It stops moisture in gas form from passing from one side of an assembly to the other. Liquid water and moving air are somebody else’s problem.
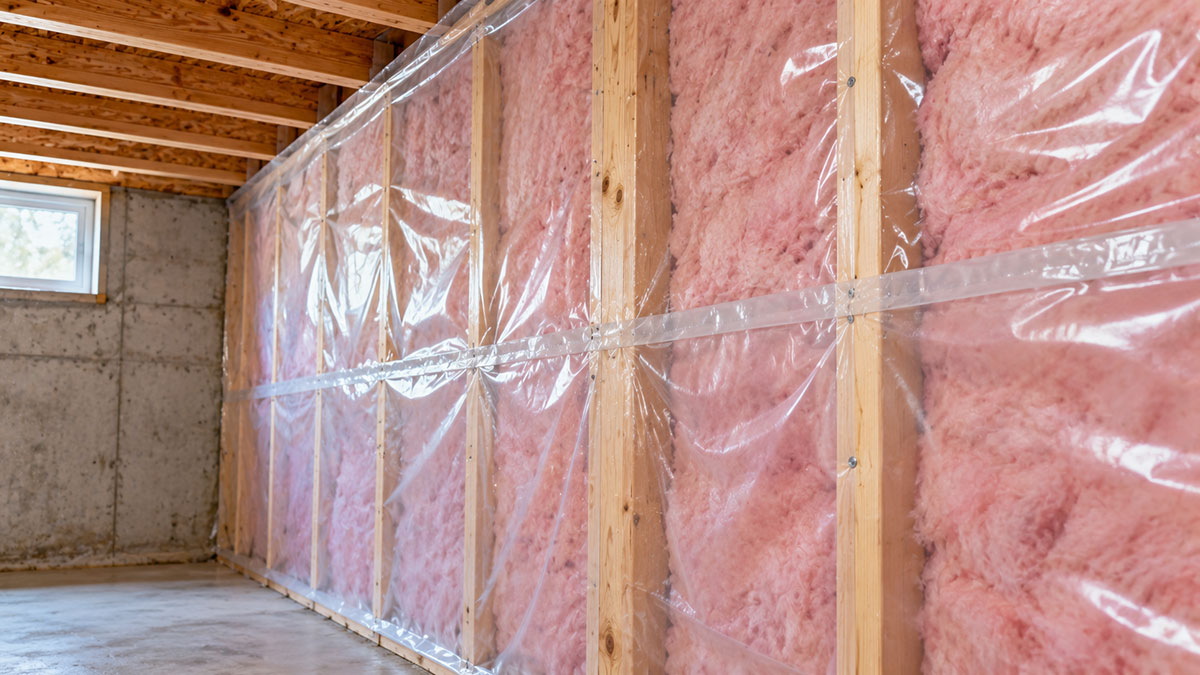
Polyethylene sheeting stapled to the framing is the version most people picture. You’ll also run into foil or kraft facing bonded to fiberglass or mineral wool batts, and sprayed or painted coatings that go straight onto a surface.
On jobsites the term gets thrown around loosely. Building codes file all of these products under the broader heading of vapor retarders, and a true vapor barrier is just the tightest end of that group.
Vapor Barrier vs Vapor Retarder: What Is the Difference?
Code only uses the term vapor retarder. Vapor barrier is the informal name for the tightest tier.
Perm rating draws the line. Johns Manville notes that a material has to test at 0.1 perm or less under ASTM E96 to count as a vapor barrier, while anything between 0.1 and 1.0 perm is classified as a vapor retarder (Johns Manville, 2024).
So every vapor barrier is a vapor retarder, but plenty of retarders never get tight enough to earn the barrier label. A barrier at 0.1 perm or below effectively stops diffusion. A retarder, which can run as high as 10 perm, only slows it down.
W. R. Meadows, a manufacturer of below-grade sheeting, publishes technical guidance on why the two terms keep getting mixed up on jobsites.
Vapor Barrier vs Air Barrier: What Is the Difference?

They solve different problems. A vapor barrier blocks water vapor from diffusing through solid material, and an air barrier blocks bulk air (plus whatever moisture that air is carrying) from moving through gaps and cracks.
| Barrier type | Function | Typical material | Primary risk addressed |
|---|---|---|---|
| Vapor barrier | Blocks vapor diffusion | Polyethylene, foil facing | Condensation inside the assembly |
| Air barrier | Blocks bulk air movement | House wrap, taped sheathing | Drafts, energy loss, moisture-laden air intrusion |
| Water-resistive barrier | Blocks liquid water | Building wrap, felt paper | Bulk water intrusion from rain |
Sealing every seam, penetration, and joint in the air barrier layer is its own trade, usually called air sealing, and it gets scheduled separately from vapor barrier installation.
DuPont’s Tyvek HomeWrap shows the split well. It qualifies as an air barrier and carries a water vapor transmission rating of 56 perms under ASTM E96 Method A (about 54 perms under Method B), according to DuPont’s product data. That number is far too high for it to ever work as a vapor barrier.
How Does a Vapor Barrier Control Moisture Movement?

Vapor moves through materials by diffusion, pushed along by a difference in vapor pressure between the two sides of an assembly.
Warm air holds more moisture than cold air. Vapor therefore travels from the moist, warm side toward the dry, cold side until the pressure evens out.
Vapor Drive and Pressure Difference
The direction flips with the season. In winter, vapor drives outward from the heated interior toward the cold exterior. In summer it drives inward, from humid outdoor air toward the air-conditioned interior.
Joseph Lstiburek at the Building Science Corporation has argued for decades that assemblies need to dry in at least one direction. A wall that can dry neither inward nor outward eventually traps whatever moisture gets in.
That one idea sits behind most modern vapor barrier placement rules.
Dew Point and Condensation Formation
Dew point is the temperature at which air can’t hold its moisture as vapor anymore, so the moisture drops out as liquid water.
Inside a wall cavity it usually shows up first on the coldest surface vapor reaches, which in winter is often the back of the exterior sheathing. Framing members and other thermal bridges run colder than the surrounding cavity, so condensation tends to form on them before anywhere else.
Once vapor turns to liquid, it no longer behaves like the gas a vapor barrier is built to stop. At that point the wall needs a drainage path or a chance to dry, not another layer of diffusion resistance.
Vapor Retarder Classes and Perm Ratings

Perm rating turns “moisture resistant” from a marketing claim into a spec you can check.
ASTM E96 is the test method behind the number, run as a dry cup or wet cup procedure depending on the material. The International Residential Code and International Building Code use the result to sort every tested material into a class.
- Class I covers 0.1 perm or less (ASTM E96, via IRC and IBC)
- Class II covers anything above 0.1 perm, up to 1.0 perm (ASTM E96, via IRC and IBC)
- Class III covers anything above 1.0 perm, up to 10 perm (ASTM E96, via IRC and IBC)
Class I
These are the impermeable materials. Sheet polyethylene, glass, sheet metal, and rubber membrane all land here, and they function as true vapor barriers under the definition covered earlier.
Used on the wrong side of a cold-climate wall, a Class I material can trap moisture instead of blocking it. That’s why placement rules exist alongside the classification.
Class II
Semi-impermeable materials sit between 0.1 and 1.0 perm. Kraft-faced fiberglass batts, unfaced expanded or extruded polystyrene, and certain vapor retarder paints all fit.
Kraft facing on fiberglass is the common example, and it typically tests in the upper half of the range.
Class III
Permeable materials run from just above 1.0 perm up to 10 perm. Latex paint over gypsum board, number 30 building paper, and standard plywood sheathing are typical examples.
Code allows Class III materials in more climate zones than Class I, because they let a wall dry in more directions.
Anything testing above 10 perm isn’t a vapor retarder at all, whatever the product label says.
Vapor Barrier Placement by Climate Zone

Climate zone decides which side of the assembly gets the vapor barrier, and whether it needs one in the first place.
The Department of Energy’s eight-zone map, adopted by the IECC, assigns every US county a zone from 1 (hot) to 8 (subarctic), according to the Insulation Institute (2024).
- Zones 5, 6, 7, 8, and Marine 4 call for a Class I or Class II retarder on the interior side of frame walls (Insulation Institute, 2024)
- Zones 1, 2, 3, and 4, except Marine 4, don’t require any class of interior vapor retarder (Building Science Corporation, BSD-106)
Cold and Mixed-Cold Climates
In zones 5 through 8 the interior is the warm side for most of the year. Vapor drives outward through the wall in winter, so the barrier goes on the interior face, ahead of the drywall.
Higher R-value insulation requirements apply here too, since the IECC sets both from the same climate zone table.
Putting a Class I barrier on the exterior side in these zones is one of the most common framing mistakes on cold-climate jobs.
Warm and Humid Climates
Zones 1 through 3, along with the warm-humid parts of zone 4, flip the logic. Air conditioning makes the interior the cool side, so vapor drives inward from the humid outside air.
An interior Class I barrier traps that inward moisture against the drywall, which is why code generally leaves interior vapor retarder requirements out of these zones. Exterior-side control does the moisture work instead, through the sheathing or a vapor-open wrap.
Building Science Corporation has documented this failure mode extensively. It accounts for a large share of hidden mold complaints in southern new construction.
Vapor Barrier Materials Compared

Material choice comes down to perm rating, cost, and how the rest of the assembly is built.
| Material | Perm rating | Vapor retarder class | Typical use |
|---|---|---|---|
| Polyethylene sheeting (6 mil) | 0.06 perm | Class I | Interior wall face, cold climates |
| Kraft-faced fiberglass batt | About 1 perm | Class II | Standard 2×4 and 2×6 wall cavities |
| Foil-faced batt or board | 0.05 perm | Class I | Cold-climate walls, ducts, roofs |
Polyethylene Sheeting
The classic choice, and still the default in cold-climate framing. Sheet polyethylene runs at 4 or 6 mil thickness and tests at roughly 0.06 perm at 6 mil, well inside Class I.
It’s cheap and every lumberyard stocks it.
It has the lowest cost per square foot of any Class I material, and it goes up easily with staples and tape. The downside is that it punctures during rough-in and breaks the seal. It’s also too tight for warm-humid climates, where it can trap inward moisture.
Kraft-Faced and Foil-Faced Facings
These facings turn insulation into a two-in-one product, sold in most lumberyards as vapor barrier insulation.
Kraft paper facing tests around 1 perm and lands in Class II. Foil and FSK facings test at 0.05 perm and land in Class I, according to Johns Manville (2024).
Kraft-faced batts cost less, show up in standard wall cavities, and are adequate for most cold-climate framing. Foil-faced batts or board cost more and double as a radiant layer, so they get used where a true Class I barrier is required.
Smart Vapor Retarder Membranes
Smart membranes change their perm rating with humidity instead of holding one fixed number.
CertainTeed’s MemBrain tests at 1 perm or less when dry and rises to about 10 perms when damp, according to CertainTeed. Pro Clima’s Intello Plus runs tighter when dry, at 0.17 perm, and opens further when damp, to about 13 perms, according to Pro Clima.
Closed-cell insulation works a little like a rigid version of the same idea. At enough thickness, it reaches Class II on its own, without a separate facing.
The appeal is that a smart membrane adjusts to the season, which lowers the risk of trapped moisture in mixed climates. It also costs more per square foot than poly sheeting or kraft-faced batts.
Where Vapor Barriers Are Installed
Location changes the rules more than material choice does. The same polyethylene sheet that code requires in one part of a house is prohibited in another.
| Location | Typical class required | Code section |
|---|---|---|
| Wall assemblies, cold climates | Class I or II | IRC R702.7 |
| Unvented attics, zones 5-8 | Class II | IRC R806.5 |
| Crawl space ground cover | Class I | IRC R408.3 |
| Slab-on-grade | Class A, ASTM E1745 | IRC R506.2.3 |
| Basement walls | Not required | N/A |
Wall Assemblies

Everything from the placement and materials sections applies here. Interior side in cold climates, exterior side or omitted entirely in warm-humid ones.
When a barrier is required at all, it sits behind the drywall and not behind the exterior sheathing.
Some builders install it on both sides out of habit. That mistake gets its own section later in this article.
Attics
Unvented attics reverse the usual logic. The 2021 IRC prohibits an interior Class I vapor retarder on the ceiling side of an unvented attic assembly, so a true vapor barrier stays off the attic floor entirely (IRC R806.5).
In zones 5, 6, 7, and 8, the air-impermeable insulation itself has to act as a Class II vapor retarder at the roof deck. Moisture control happens through insulation placement and R-value, not through a separate barrier layer.
Skip this rule and the trapped moisture has nowhere to go except into the roof sheathing.
Crawl Spaces
Unvented crawl spaces need a continuous Class I vapor retarder laid over the exposed earth, per IRC R408.3.
- Joints overlap 6 inches minimum and get sealed or taped
- Edges run at least 6 inches up the stem wall and are sealed to it
- Coverage stays continuous instead of being spot-placed around piers and footings
Home Innovation Research Labs has published video guidance on lapping polyethylene up crawl space walls and piers, since that detail gets missed on jobsites more often than the ground coverage does.
The full lapping and sealing sequence, including how piers, ductwork, and sump openings get handled, is covered separately under how to install a vapor barrier in a crawl space.
Slab Foundations
A minimum 10-mil vapor retarder meeting ASTM E1745 Class A goes between the slab and the base course or subgrade, with joints lapped at least 6 inches, per IRC R506.2.3 (2021 edition).
Class A, B, and C membranes share the same permeance threshold. What separates them is puncture resistance and tensile strength, not how well they block vapor.
Thicker membranes survive rebar placement and foot traffic better, which is the real reason Class A gets specified for flooring-sensitive slabs.
Basements
This is the one location code generally exempts. A vapor retarder isn’t required for basement walls or for any portion of a wall below grade, according to the Insulation Institute.
Insulation strategy for those walls, covered separately under insulating basement walls, follows different rules than the vapor retarder question.
Moisture in a basement mostly comes from bulk water and groundwater pressure, not vapor diffusion. Drainage and waterproofing fix that. A vapor barrier layer won’t.
How to Install a Vapor Barrier

Sequence matters more than any single step here. Install the barrier out of order and even the right material in the right class fails to do its job.
- Confirm the required class and placement side for the climate zone and location before ordering material
- Clean and dry the substrate, removing debris that could puncture the sheeting
- Run the sheet or facing across the framing or substrate, working from one corner outward
- Overlap seams by at least 6 inches and seal them with compatible tape or adhesive
- Seal every penetration, including electrical boxes, pipes, and wiring holes, individually
- Extend and seal the membrane up adjoining walls or stem walls where the assembly requires it
- Inspect the completed layer for tears or gaps before insulation or drywall covers it
Penetration sealing and the pre-cover inspection get skipped most often.
Stego Industries’ installation specifications treat taped, overlapped seams as part of the vapor barrier system itself, not an optional finishing touch, since an unsealed lap defeats the perm rating the material was tested at.
A membrane with a Class I perm rating still performs like an open Class III material at every unsealed seam and puncture.
When a Vapor Barrier Does Not Apply, or Fails

A vapor barrier isn’t a default upgrade for every wall. On the wrong assembly it stops being moisture control and becomes moisture containment, on the inside of the wall.
It helps in cold and mixed-cold climates (zones 5 through 8) on the interior face, under slabs in any climate per IRC R506.2.3, and as a ground cover in unvented crawl spaces per IRC R408.3.
It causes damage in a few specific spots.
- On the interior wall face in warm-humid climates
- On the ceiling side of unvented attic assemblies, where code prohibits it outright
- On both sides of the same wall assembly at once
Wrong-Side Placement
The failure is about direction, not material.
A Class I barrier installed on the exterior of a cold-climate wall blocks the wrong side from drying. Winter vapor drive pushes outward, and now the vapor has nowhere to go before it hits cold sheathing.
The identical polyethylene sheet performs correctly on the interior face and traps moisture on the exterior face.
Contractors moving between regions carry habits with them, and a cold-climate crew working a warm-humid job is the most common source of this mistake.
Double Vapor Barrier Assemblies
Impermeable on both sides means drying on neither. A double vapor barrier wall pairs a Class I interior barrier with foil-faced or foam sheathing outside, and any moisture that gets in during construction has nowhere to go.
The International Code Council revised Class III provisions for Climate Zones 7 and 8 in the 2021 IBC and IRC specifically to correct an earlier error that had treated the two zones identically on this point.
Confusion over whether Tyvek is a vapor barrier leads some builders straight into this trap. They treat the vapor-open water-resistive wrap as if it already blocks diffusion, then add a genuinely impermeable layer on top of it without realizing they now have two.
Warm-Humid Climate Misuse
Same trap, applied to a region instead of a single assembly.
Air conditioning keeps the interior cool and dry most of the year, so vapor drives inward from humid outside air toward the drywall. An interior Class I barrier intercepts that vapor and holds it against the back of the drywall.
Paint and drywall paper both feed mold once trapped moisture builds up there. The wall can’t dry inward because the barrier blocks it, and it can’t dry outward either, since the humid exterior air resists that direction too.
The common thread is a national framing crew or product line applying one cold-climate detail everywhere, regardless of the zone stamped on the plans.
FAQ on What Does A Vapor Barrier Do
What Is the Difference Between a Vapor Barrier and a Water-Resistive Barrier?
A water-resistive barrier, or house wrap, blocks liquid water while staying vapor-open. A vapor barrier blocks vapor diffusion instead.
Tyvek and similar products function as one but never the other, since a high perm rating disqualifies a material from acting as a true vapor barrier.
Is a Vapor Barrier Required in Every Climate Zone?

No. The IRC requires an interior Class I or Class II vapor retarder only in zones 5 through 8 and Marine 4.
Zones 1 through 4 generally omit the requirement, since warm-humid conditions reverse the direction moisture needs to escape.
How Much Does a Vapor Barrier Cost Compared to Other Moisture Control Methods?
Polyethylene sheeting is the cheapest Class I option per square foot on the market.
Foil facing, smart membranes, and full crawl space encapsulation cost more, since they add variable permeance, radiant properties, or complete perimeter sealing on top of basic diffusion control.
Does a Vapor Barrier Improve Energy Efficiency?
Not directly. A vapor barrier carries no R-value of its own, but it protects the insulation behind it from moisture that would otherwise reduce thermal performance.
Wet fiberglass or cellulose loses R-value fast, so moisture control indirectly protects energy efficiency.
What Tools Are Needed to Install a Vapor Barrier?
A staple gun or cap nailer, a utility knife, a tape measure, and compatible seam tape cover most jobs.
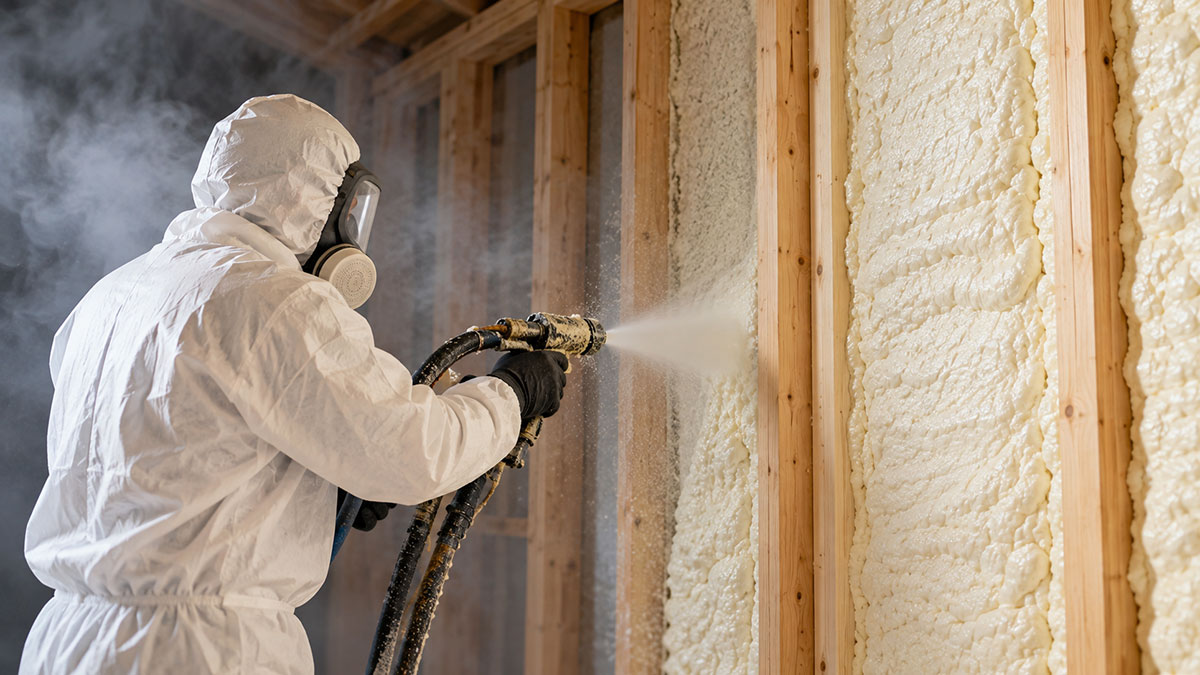
Spray foam applications need a spray rig instead, and crawl space work usually adds fasteners for securing sheeting up the stem wall.
Do Vapor Barrier Seams Need to Be Taped or Sealed?
Yes. An unsealed overlap behaves like an opening, not a barrier, regardless of the material’s tested perm rating.
Code requires joints to overlap at least 6 inches and be sealed or taped, especially in crawl spaces and under slabs.
Can a Vapor Barrier Be Installed Over Existing Insulation in a Retrofit?
Usually yes, applied to the interior face before new drywall goes up.
Retrofits favor smart vapor retarders over rigid polyethylene, since existing walls often can’t be inspected for trapped moisture, and a variable-permeance membrane tolerates that uncertainty better.
What Determines Whether a Vapor Barrier Actually Works?
It works only when its class, placement side, and sealing all match the assembly it protects. Otherwise it traps moisture instead of blocking it.
Diagnosing a suspected failure follows a different order than installing the material. Check the placement side against the climate zone first, then seam and penetration integrity, and look at the material class against the assembly’s perm needs last.
Placement failures announce themselves within a season or two. A mismatched class can hide inside a wall for years before any symptoms appear.
Even a correct diagnostic order has a limit. In unvented roof assemblies, IRC R806.5 requires enough insulation above the deck to keep the condensing surface above 45 degrees Fahrenheit, and below that number no vapor retarder class saves the assembly by itself.
The insulation carrying that load, and how insulation works within the same cavity, decides whether the vapor barrier’s class ever gets tested.