
Summarize this article with:
Spray foam sticks to everything. That is the whole point of it, until you need it gone.
Knowing how to remove spray foam insulation matters whether you are dealing with a bad install, a renovation, or a mortgage surveyor who flagged the foam on your roof sheathing. The polyurethane bond between foam and substrate does not come apart easily, and the wrong approach damages wood framing, wiring, and the surfaces underneath.
This guide covers removal methods for both cured and uncured foam, the specific tools and solvents that actually work, surface-by-surface techniques for wood, concrete, metal, and vinyl, plus the safety precautions that keep polyurethane dust out of your lungs.
What is Spray Foam Insulation Removal

Spray foam insulation removal is the process of cutting, scraping, or dissolving polyurethane foam from building surfaces where it has been applied.
Spray foam insulation is made from two chemicals: isocyanate and polyol resin. When these compounds react, they expand up to 60 times their liquid volume and harden into a rigid or semi-rigid thermal barrier.
That chemical bond is exactly what makes removal so difficult. The foam adheres directly to wood, concrete, metal, and other substrates. It does not peel off cleanly like batt insulation or pull out in chunks like loose-fill insulation.
Removal methods depend on whether the foam is still uncured (wet and tacky) or fully cured (hardened solid). Uncured foam dissolves with acetone. Cured foam requires mechanical cutting, scraping, and sometimes industrial vacuum equipment.
The curing process typically takes 24 hours. Attempting removal before the foam fully hardens actually makes the job messier, not easier.
Why Does Spray Foam Insulation Need to Be Removed

Most people don’t install spray foam planning to rip it out later. But things go wrong. Sometimes the installation itself is the problem, sometimes the building changes around it.
Poor Installation
Improperly mixed or applied spray foam can release chemical odors and volatile organic compounds into living spaces. This off-gassing happens when the foam doesn’t cure correctly, and it turns the insulation into an indoor air quality hazard rather than an energy upgrade.
If the ratio of isocyanate to polyol resin is off during application, the foam stays tacky, smells, and never reaches its intended R-value. The only fix at that point is full removal.
Renovation and Remodeling
Wall cavities need to be opened during structural changes or electrical rewiring. Foam has to come out first.
Some homeowners also remove older spray foam to upgrade to a higher R-value product, or to switch to spray foam or cellulose insulation depending on the application. Took me a while to realize that sometimes the “best” insulation in 2015 isn’t the best choice anymore.
Moisture Damage and Pest Damage
Open cell foam absorbs water. When moisture reaches the foam through roof leaks or condensation, it saturates the material and creates conditions for mold growth on the sheathing underneath.
Rodents and insects also tunnel through open-cell foam in attics and crawl spaces. Once pests compromise the insulation, patching rarely works. Full removal and replacement is the standard approach.
Mortgage and Property Survey Requirements
This one catches people off guard. In the UK especially, mortgage lenders and property surveyors flag spray foam on roof rafters as a risk factor.
The concern is that foam applied directly to roof sheathing can trap moisture against the timber, causing rot that stays hidden for years. Some lenders refuse to approve a mortgage until the foam is removed. Property sales fall through over this regularly.
In the US, similar concerns come up during home inspections, though lender requirements vary by region.
What Types of Spray Foam Affect the Removal Process

The type of foam on your walls or roof determines everything about how the removal goes. Three types exist, and each one behaves differently when you try to cut, scrape, or dissolve it.
Open-Cell Spray Foam
Open-cell foam has a density of about 0.5 pounds per cubic foot. It is soft, spongy, and the easiest type to remove with basic hand tools like a serrated blade or putty knife.
The lower density means less adhesion to substrates. You can pull large sections away from studs and sheathing without extreme force. The tradeoff is that open-cell foam crumbles into small particles during removal, creating more cleanup.
Closed-Cell Spray Foam
Closed-cell foam is a different situation entirely. At roughly 2 pounds per cubic foot, it is rigid, dense, and bonds aggressively to every surface it contacts.
Hand tools work for small areas, but larger closed-cell removal jobs almost always require power tools. A reciprocating saw or oscillating multi-tool cuts through the material faster. Even then, expect slow progress. The higher closed-cell insulation density that makes it a superior thermal barrier also makes it the hardest foam to remove.
Canned Expanding Foam
Single-component canned foam (brands like Great Stuff) is common around door frames, window gaps, and pipe penetrations. It is a different chemical formulation than professional two-component spray foam.
Canned foam is easier to cut out of cavities with a chisel or utility knife. For uncured canned foam, acetone dissolves it quickly. The difficulty increases significantly once it fully hardens, but it still comes out faster than professional-grade closed-cell product.
What Tools Are Used to Remove Spray Foam Insulation
Your tool choice depends on the foam type, the surface underneath, and whether you are removing a small patch or stripping an entire attic. Here is what actually gets used on real removal jobs.
Hand Tools
- Putty knife and flat bar for prying foam off flat surfaces
- Chisel and hammer for chipping hardened foam from tight spaces and cavities
- Serrated blade (a bread knife works, honestly) for slicing through open-cell foam
- Plastic scraper for delicate surfaces like vinyl and PVC where metal tools cause scratches
- Hard-bristled brush and paint scraper for removing residue layers on wood, brick, and concrete
- Sandpaper (80-120 grit) for final surface smoothing after bulk removal
Hand tools give you precision. They are slower but reduce the risk of damaging wiring, plumbing, or the substrate underneath.
Power Tools
- Reciprocating saw (Sawzall) for cutting large sections of closed-cell foam from rafters and wall cavities
- Oscillating multi-tool for detailed cutting in corners and around obstacles
- Power drill with wire brush attachment for scrubbing stubborn residue off concrete and masonry
Power tools are necessary for closed-cell foam on large-scale projects. Go slow near electrical wiring. A reciprocating saw blade through a live wire is not something you want to experience.
Spray Foam Removal Machines
For full attic or whole-building removal, professional crews use industrial insulation vacuum removal equipment. These machines are large, high-powered vacuums with expandable hoses that reach into attics and wall cavities.
The process works like this: chip or cut the foam from surfaces manually, then vacuum the debris through the hose into a collection bag. The vacuum alone cannot pull cured foam off a substrate. It only handles the loose material after mechanical removal.
Most spray rig equipment designed for installation can be adapted for removal work, though dedicated removal machines are more common on professional jobs.
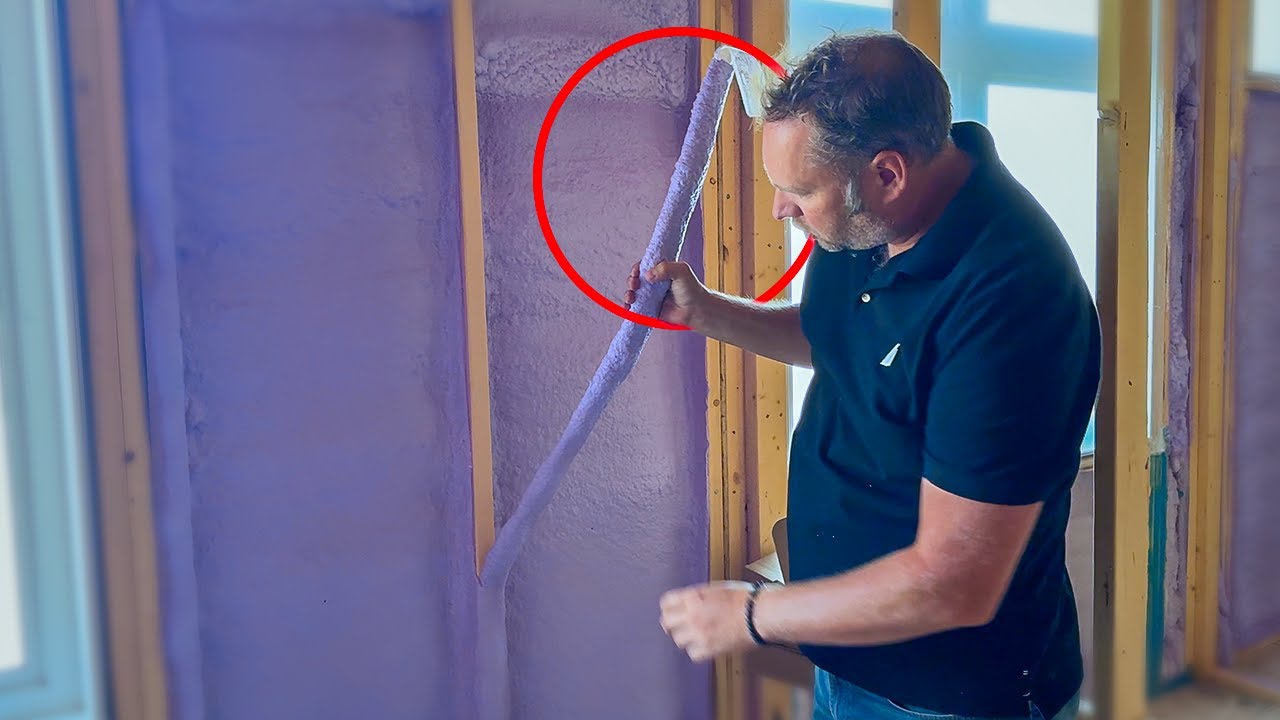
How to Remove Cured Spray Foam Insulation Manually

Wait for the foam to fully cure. This is the single most important step. Trying to cut or scrape foam that hasn’t fully hardened (under 24 hours old) creates a sticky, stringy mess that spreads to everything it touches.
Once cured, follow this sequence:
- Score the foam with a utility knife along the edge where it meets the substrate. This creates a starting point for removal.
- Cut large chunks away using a serrated blade or reciprocating saw. Work in sections rather than trying to remove everything at once.
- Chisel remaining foam from corners, cavities, and areas where the blade cannot reach. A flat bar helps for prying sections off studs and rafters.
- Scrape residue using a paint scraper or hard-bristled brush. Foam leaves a thin bonded layer on most surfaces that requires aggressive scraping.
- Sand the surface with 80-120 grit sandpaper for a clean finish, especially on wood framing that will be re-insulated or left exposed.
Be extremely careful around electrical wiring in wall cavities. Foam often encases wires completely, and cutting blindly through it can expose or sever live conductors.
Wear a respirator mask, safety goggles, and protective gloves during the entire process. Polyurethane particles from cured foam are not something your lungs handle well. Proper ventilation in the work area matters too, especially in enclosed spaces like attics and crawl spaces.
For larger removal projects in attics, consider whether removing attic insulation professionally might save you time and prevent structural damage. Some jobs are genuinely better left to crews with the right equipment.
How to Remove Uncured Spray Foam Insulation
Uncured foam is still wet, tacky, and hasn’t fully hardened. You have roughly a 24-hour window before the polyurethane chemical reaction completes and the foam becomes solid.
Wipe wet foam immediately with a clean cloth dampened in acetone. Don’t rub it around. Press the cloth onto the foam, let the acetone dissolve the polyurethane for 15-20 seconds, then lift away.
Commercial foam cleaner sprays work the same way but are less aggressive on sensitive surfaces. Either option only works before full cure. Once the foam hardens, acetone does almost nothing.
Timing is everything here. If you catch a spray foam overspray mistake within the first few minutes, cleanup takes seconds. Wait overnight and you are stuck with mechanical removal.
What Chemicals and Solvents Remove Spray Foam
Acetone
Acetone dissolves uncured polyurethane foam on contact. Apply it with a clean cloth or rag directly to the wet foam, then wipe clean. Zero effect on fully cured foam.
Lacquer Thinner
Professional installers use lacquer thinner to clean residue after the bulk foam has been scraped away mechanically. It dissolves thin uncured polyurethane layers that scraping alone misses.
Chemical Strippers and Paint Thinners
These work on partially cured foam and thin residue layers. Always test on a small hidden area first, because paint thinner can damage wood finishes, painted surfaces, and certain plastics.
Natural Alternatives
- Olive oil softens cured foam when applied generously and left to soak for 2-3 hours, making it easier to cut
- White vinegar breaks down foam adhesion after several hours of contact
- Saline solution works on wood surfaces; apply, wait 5 minutes, wipe with a damp cloth
Natural methods are slower but safer for indoor use and surfaces where chemical solvents cause damage.
How to Remove Spray Foam from Different Surfaces
How to Remove Spray Foam from Wood
Score the foam edge with a utility knife, then pry sections off with a flat bar. For stubborn residue, apply olive oil and let it soak before scraping with a plastic scraper to avoid gouging the wood grain.
Sand with 120-grit paper for a clean finish. Wood framing in wall cavities and attic rafters is the most common surface you will deal with during a full foam insulation removal project.
How to Remove Spray Foam from Concrete
Chisel and hammer. That is the primary method for concrete. Break up the hardened foam in chunks, then scrub remaining residue with a wire brush or power drill with brush attachment.
Concrete is forgiving. You can be aggressive with tools without worrying about surface damage. Basement walls and foundation surfaces often have spray foam applied during basement wall insulation projects that later needs replacing.
How to Remove Spray Foam from Metal
Remove as much foam as possible while it is still wet. Once cured on metal, use a scraper to cut away the bulk, then apply acetone or lacquer thinner with a cloth to dissolve the remaining film.
Scrub gently with a soft brush to avoid scratching. Rinse with warm soapy water. Metal ductwork and flashing are common trouble spots.
How to Remove Spray Foam from Vinyl and PVC
Use a plastic scraper only. Metal tools scratch vinyl permanently.
Do not use acetone on PVC materials. It dissolves the plastic. Warm soapy water and a foam cleaner spray are the safe options for vinyl siding, PVC trim, and window frames.
How to Remove Spray Foam from Skin and Hands
Wet foam on skin: wipe immediately with acetone-soaked cloth, then wash with soap and water.
Dried foam on skin: fill rubber gloves halfway with warm water and dish soap, put them on, tape around wrists, and leave for a few hours. The moisture softens the bond. A pumice stone also works for scrubbing dried polyurethane off hands, followed by petroleum jelly left on for an hour under a glove.
How to Remove Spray Foam from Clothes
Cured foam on fabric is nearly permanent. Your best options are freezing the garment to make the foam brittle enough to crack off, or dabbing uncured spots with acetone (test for color damage first). Trimming hardened foam with scissors removes the bulk but leaves residue in the fibers.
What Safety Precautions Are Needed for Spray Foam Removal
Polyurethane foam particles are a respiratory hazard. Cured foam dust contains isocyanate residue that irritates lungs and mucous membranes. OSHA recommends respiratory protection whenever disturbing spray polyurethane foam (SPF).
Required protective equipment:
- Respirator mask (N95 minimum, P100 half-face for closed-cell removal in enclosed spaces)
- Safety goggles, not just glasses, because foam particles travel
- Chemical-resistant gloves when using acetone, lacquer thinner, or paint stripper
- Long sleeves and pants to prevent skin contact with dust and solvent splashes
Ventilate the work area. Open windows, run fans, create cross-ventilation. Attic removal jobs in summer heat without ventilation are dangerous.
Check for electrical wiring before cutting into any wall cavity or rafter bay. Foam encases wires completely, and a reciprocating saw blade does not distinguish between polyurethane and copper. Knowing whether spray foam insulation is flammable also matters when working near heat sources or electrical panels.
How Much Does Professional Spray Foam Removal Cost
Professional spray foam removal typically costs between $1.50 and $3.00 per square foot, though closed-cell removal in hard-to-access areas like attic rafters can push that higher.
Cost factors include:
- Foam type (open-cell is cheaper to remove than closed-cell)
- Total square footage
- Accessibility (attic vs. wall cavity vs. crawl space)
- Disposal fees for polyurethane waste
- Regional labor rates
A full attic removal on a 1,500 square foot home runs $2,000-$5,000 on average. Understanding the full cost of spray foam insulation upfront, including potential removal expenses, helps avoid surprises later.
DIY saves money but risks structural damage. Cutting too deep into roof sheathing or nicking wires costs more to repair than hiring a crew. For small patches around doors and windows, DIY makes sense. For an entire attic or full wall cavity job, get quotes.
What to Do After Removing Spray Foam Insulation
Removal is half the job. What comes next determines whether your building performs better or worse than before.
Clean all surfaces thoroughly. Foam residue left on studs, rafters, and sheathing prevents proper adhesion of new insulation and can interfere with air sealing performance.
Inspect the exposed framing and sheathing for moisture damage, mold, and rot. This is especially important on roof decking where foam was applied directly to OSB or plywood. Look at vapor barrier condition too. If it was compromised by the old foam installation, it needs replacing before new insulation goes in.
Replacement insulation options after foam removal:
- Fiberglass insulation batts for standard wall cavities and attic floors
- Rock wool insulation for areas needing higher fire resistance and soundproofing
- Cellulose insulation for dense-pack applications in enclosed cavities
- New spray foam (properly installed this time) for areas that need both insulation and air barrier performance
- Rigid foam board insulation for continuous insulation on exterior sheathing
Before re-insulating, run a blower door test to identify remaining air leaks in the building envelope. Fixing air leakage paths before adding new insulation gets you more performance per dollar than just stuffing new material into the same cavities.
Consider a home energy audit to evaluate the overall thermal performance of the house. An audit identifies weak points beyond the area where foam was removed, including thermal bridging at framing members and gaps in the way insulation works across the entire building envelope.
Some homeowners qualify for a weatherization rebate or insulation tax credit when upgrading insulation after removal. Check federal and state programs before starting the reinstallation, because the ROI on insulation upgrades improves significantly when rebates offset material costs.
FAQ on How To Remove Spray Foam Insulation
Can you remove spray foam insulation yourself?
Small areas around doors and windows are manageable with a chisel, putty knife, and serrated blade. Full attic or wall cavity removal is a different story. Large-scale jobs typically require professional crews with industrial vacuum equipment.
What dissolves cured spray foam?
Nothing dissolves fully cured polyurethane foam effectively. Mechanical removal with cutting tools and scrapers is the only reliable method. Acetone and lacquer thinner only work on uncured or partially cured foam that hasn’t fully hardened.
Does acetone remove spray foam?
Acetone dissolves uncured spray foam on contact. Apply it with a clean cloth, press onto the wet foam, and wipe away. Once the foam cures completely after 24 hours, acetone has no meaningful effect on hardened polyurethane.
How long does spray foam take to cure before removal?
Spray foam becomes stiff within minutes but takes approximately 24 hours to fully cure. Waiting for full cure before attempting removal makes the foam easier to cut cleanly rather than creating a sticky, stringy mess.
Is removing spray foam insulation dangerous?
Cured foam dust contains isocyanate residue that irritates lungs and mucous membranes. A respirator mask, safety goggles, and chemical-resistant gloves are required. Adequate ventilation in the workspace prevents particle buildup during removal.
How much does professional spray foam removal cost?
Professional removal runs $1.50 to $3.00 per square foot. A full attic on a 1,500 square foot home costs $2,000 to $5,000 on average. Closed-cell foam and poor accessibility increase the price.
What is the best tool for removing spray foam?
A reciprocating saw handles large closed-cell foam sections fastest. For open-cell foam, a serrated blade or bread knife cuts through it efficiently. Putty knives and chisels handle detail work in tight cavities and corners.
Can spray foam be removed from wood without damage?
Score the foam edge with a utility knife, then pry it off with a flat bar. Apply olive oil to soften stubborn residue before scraping with a plastic scraper. Sand with 120-grit paper for a clean finish.
Is closed-cell foam harder to remove than open-cell?
Closed-cell foam at 2 pounds per cubic foot is significantly harder to remove than open-cell at 0.5 pounds. Its rigid density and aggressive substrate bond almost always require power tools for efficient removal.
What should you do after removing spray foam insulation?
Inspect exposed framing and sheathing for moisture damage, mold, or rot. Clean all residue from surfaces before reinstalling new insulation. A blower door test identifies remaining air leaks that should be sealed first.
Conclusion
Removing spray foam insulation is slow, physical work. Whether you are dealing with open-cell foam in an attic or dense closed-cell product bonded to roof sheathing, the process demands the right tools, proper safety gear, and patience.
Acetone handles uncured polyurethane. Mechanical methods handle everything else. There is no shortcut for cured foam.
Match your approach to the foam type and the surface underneath. Protect yourself with a respirator mask and goggles every time. And inspect the framing for moisture damage before putting new insulation back in.
Small DIY patches are reasonable. Full-scale removal across an attic or wall cavity is where professional crews with industrial vacuum equipment earn their cost. Know the difference before you start cutting.


