Ask three contractors what insulation runs per square foot and you get three different answers, none of them wrong. The rate is material plus labor divided by area, and both of those inputs move around a lot between one house and the next.
It stays the number everyone quotes anyway, because square footage is the one thing a contractor can measure on a walkthrough without guessing. Homeowners lean on it to line up bids across fiberglass, cellulose, spray foam and mineral wool no matter how big the house is.
Material alone runs from $0.25 per square foot for basic polystyrene board up to $6.75 for wood fiber, according to HomeAdvisor (2026). That top end sits a long way past the fiberglass batts most people assume they are buying.
What Is Cost Per Square Foot for Insulation?
The figure folds material and labor into one number so that jobs of different sizes can be judged on the same terms. A 1,200 square foot attic and a 2,400 square foot attic become comparable, whatever product either one uses.
The average U.S. homeowner spends $1,852 on a full insulation job, with per square foot pricing running from $0.40 to $6.75 depending on material and labor (HomeAdvisor, 2026). A bare-bones fiberglass top-up sits at one end of that spread. A full closed-cell spray foam retrofit sits at the other.
What the number covers is narrower than people expect. It reflects what a contractor charges to buy and install the material, and nothing else. No air sealing done ahead of the job. No hauling out whatever is already up there.
Most quotes bundle the same handful of items.
- Material cost for the insulation product itself
- Labor to cut, fit, or spray the material into place
- Basic cleanup of the work area
- Disposal of packaging and offcuts
Old insulation removal, structural repairs and air sealing usually show up as their own line items, billed separately. Worth asking about before you sign anything.
Insulation Cost by Material Type

Material choice moves the price more than any other single factor in an insulation project.
Fiberglass batt, blown-in cellulose, spray foam, mineral wool and rigid foam board cover most residential work. It helps to get familiar with the types of insulation materials on the market before pricing a job, since R-value per inch and installed cost swing widely between them.
| Material | Cost per Square Foot | R-Value per Inch | Best For |
|---|---|---|---|
| Fiberglass batt | $0.30-$1.50 | R-2.9 to R-3.8 | Open attics, accessible walls |
| Blown-in cellulose | $0.60-$2.30 | R-3.1 to R-3.8 | Attic floors, irregular framing |
| Spray foam | $1.00-$2.00 | R-3.5 to R-6.5 | Rim joists, tight cavities, air sealing |
| Mineral wool | $1.40-$4.00 | R-3.1 to R-3.2 | Fire resistance, soundproofing |
| Rigid foam board | $0.25-$2.00 per board foot | R-4.0 to R-6.0 | Basement walls, exterior sheathing |
Pricing from HomeAdvisor (2026), R-value data from the U.S. Department of Energy.
Fiberglass stays the budget pick for an unglamorous reason. Owens Corning, Johns Manville and CertainTeed mass produce it, supply stays steady, and prices stay low.
Cellulose is mostly recycled paper treated with borate. It costs more per square foot than fiberglass but packs tighter into attic floors and irregular bays, which is where fiberglass tends to leave voids. Choosing between spray foam or cellulose insulation usually comes down to budget against air sealing performance, since foam closes gaps that loose cellulose alone cannot.
Mineral wool, sold under brand names like Rockwool, resists fire and blocks sound better than fiberglass at a similar thickness. Contractors like it. Homeowners mostly balk at the price.
Rigid foam board costs the most per board foot. It also delivers among the highest R-values per inch of anything on this list, with closed-cell spray foam the only real match, which matters when the wall cavity is shallow and adding thickness is not an option.
What Determines Insulation Cost Per Square Foot?

Material sets the floor. Everything after that comes down to how hard the crew has to work to hit the R-value your climate zone requires.
Beyond the product itself, the price moves on access difficulty (an open attic versus a finished wall versus a crawl space), the R-value target your climate zone and building component call for, whether existing insulation has to come out first, and local labor rates.
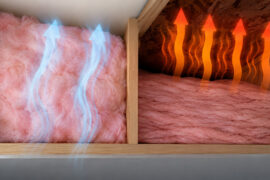
Understanding how insulation works explains why the R-value target drives so much of the bill. Insulation slows heat transfer rather than blocking it outright, so more resistance means more material thickness, and more thickness means more money per square foot.
Spray foam bends that rule slightly. A thin layer air-seals and insulates at the same time, which is why it costs more per square foot but sometimes needs less total depth to hit the same target.
Removing old insulation adds a separate charge almost every time. Someone has to bag and haul out decades of old batts or loose fill before the actual job starts.
Labor Cost Versus Material Cost for Insulation

Labor and material split the bill differently depending on what you pick.
Most installers charge $40 to $80 per hour, and that rate barely moves whether they are stapling in batts or blowing in cellulose (HomeAdvisor, 2026).
Spray foam changes the math. Applying it takes spray rig equipment that heats and pressurizes a two-part chemical mix, plus protective gear and a sealed-off work area, so labor eats a bigger share of the total than it does with batts or blown-in fiberglass.
Pulling old insulation out adds its own labor line, often billed separately using insulation vacuum removal equipment for attics packed with dust and debris.
Roughly how the labor share lands by material:
- Fiberglass batt, where labor runs light and often stays under half the total bill
- Blown-in cellulose, where labor and material land close to even
- Spray foam, where labor and equipment can push past half the total
DIY removes the labor line entirely for straightforward jobs like batts or rigid board. It also puts compression and gap-filling mistakes on you instead of a trained crew, which is a real cost, just not one that shows up on an invoice.
R-Value and Minimum Insulation Requirements by Climate Zone
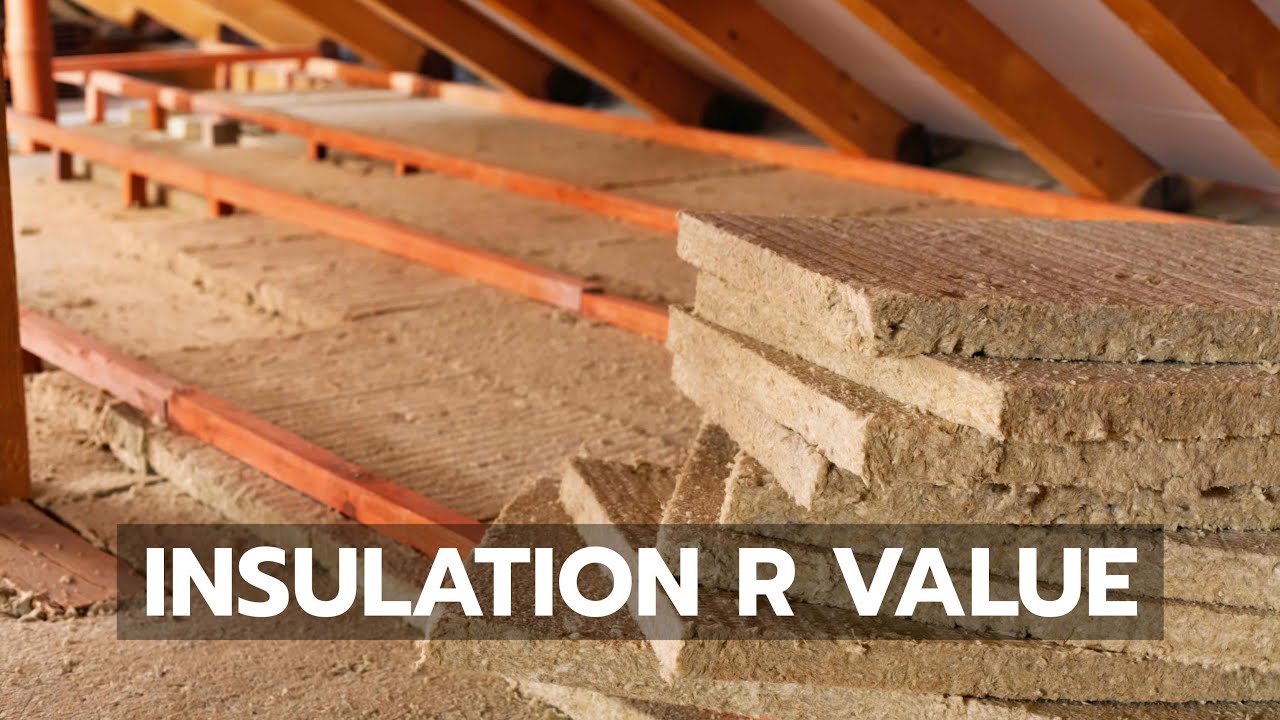
Every U.S. county sits inside one of eight climate zones, and each zone sets its own minimum.
The thing being regulated is R-value, a material’s resistance to heat flow. Higher number, better performance.
Under IRC 2021 N1102.1.3, attics need R-30 in Zone 1, R-38 in Zones 2 and 3, and R-49 in Zones 4 through 8 (International Code Council). That last bracket covers most of the continental United States.
Wall cavities need less material than attics in most zones. Code minimums commonly land between R-13 and R-21 depending on the zone and the wall assembly.
U-value measures the same heat flow from the opposite direction, expressing how much heat moves through an assembly rather than how well it resists the movement. Contractors quote in R-value because it stacks. Add an R-19 batt on top of existing R-13 and you have R-32. U-value mostly shows up on window and door labels.
A higher required R-value means more inches of material, and more inches means a higher price per square foot, whichever product you choose.
Insulation Cost by Installation Location

Where the insulation goes changes the price almost as much as what it is made of.
Attics run cheapest per square foot because they stay open and accessible. Finished walls and basements cost more, since a crew has to work around framing, drywall or moisture.
| Location | Cost per Square Foot | Why |
|---|---|---|
| Attic | $1.00-$7.00 | Wide range, batt top-up to spray foam |
| Wall | $1.00-$4.00 | Drywall access adds labor |
| Basement | $1.50-$2.50 | Moisture control, rim joist sealing |
| Garage | $0.50-$1.25 | Fewer code requirements, simple access |
Figures from HomeAdvisor (2026).
Attic Insulation Cost
Attic work sits at the wide end of that range because it covers everything from a basic fiberglass top-up to a full closed-cell spray foam job.
Heat rises, so most homes carry roughly twice as much insulation in the attic as in the walls. That alone explains part of why attic budgets swing so hard.
- Batt or roll top-up over existing material
- Blown-in cellulose or fiberglass across the full attic floor
- Spray foam along the roofline for a conditioned attic
Wall Insulation Cost
Retrofitting walls costs more than insulating them during framing. Not close, either.
On an existing home, a contractor has to open the wall or drill into it. That is where drill-and-fill insulation comes in. Small holes get drilled between studs, insulation gets blown in, holes get patched.
Cavity fill runs $1.00 to $2.00 per square foot on top of material cost, since most existing walls already have drywall in place.
Crawl Space and Basement Insulation Cost
Basement and crawl space work usually costs less per square foot than walls. Moisture control then adds its own line item and eats some of that saving.
Moisture drives the decision down here, not material preference.
Rigid foam board handles damp concrete better than batts do, and insulating basement walls properly usually means rigid board against the concrete with a vapor-resistant layer over it.
- Rigid foam board against the concrete wall
- Vapor-resistant layer over the foam
Crawl spaces sealed with a vapor barrier and rigid foam typically land in the same $1.50 to $2.50 per square foot range as basement walls.
Average Total Cost to Insulate a House
The whole-home average already covers a lot of ground. $1,852 typical, $498 to $4,500 for most projects (HomeAdvisor, 2026).
What that average hides is how much square footage moves the total while barely touching the per square foot rate.
Total project figures worth knowing (HomeAdvisor, 2026):
- Whole-home average of $1,852, with most projects between $498 and $4,500
- Attic insulation totaling $1,500 to $6,000 depending on material and depth
- Basement insulation totaling $1,400 to $6,300 with moisture control included
New construction comes in cheaper per square foot than retrofitting an occupied home. A crew working open framing moves faster than one working around finished walls and furniture.
Retrofit insulation projects also tend to turn up surprises. Old wiring, moisture damage, a chimney chase nobody sealed in 1974. All of it adds to the final number.
A 3,000 square foot home does not cost three times as much to insulate as a 1,000 square foot home, because fixed costs like equipment setup and mobilization spread across more area. The benefits of home insulation scale in the same direction. A bigger house wastes more energy when it is under-insulated, so the payoff grows along with the project cost.
Bigger homes get a lower rate per square foot and a larger bill to pay in wasted energy if they skip the work.
How Does Insulation Cost Vary by Region?
The same job prices differently in Vermont than it does in Alabama.
Labor is the biggest swing factor, since insulation crews get paid according to local wage markets and not a national rate card. New York insulation workers earn an average of about $64,700 a year, more than 30% above the national median of $49,120 for the trade (U.S. Bureau of Labor Statistics, OEWS). Plenty of states pay well under that national figure, which is why identical batt work can cost noticeably less in a lower-wage market.
Climate zone stacks on top of wage differences. A house in a cold zone needs more inches of material to reach its required R-value than the same house in a warm zone, so material cost per square foot climbs before labor even enters the picture.
California adds a third variable most states skip. Title 24 sets stricter insulation and building envelope requirements than the baseline energy code, which pushes both material and inspection costs higher on California projects.
Some states flip the equation the other way through utility and state programs. Massachusetts runs Mass Save, which covers up to 100% of approved insulation costs for qualifying homes. Similar free home insulation programs run elsewhere through utility partnerships, and they are worth checking before you accept any quote.
Shipping matters less but still shows up in remote markets, since rigid foam board and specialty spray foam chemicals often come from a handful of regional distributors.
DIY Insulation Cost Versus Professional Installation Cost
Doing the work yourself takes labor off the bill completely. It only works for a narrow set of insulation types, though.
DIY installation saves $575 to $750 compared to hiring a pro, according to HomeAdvisor (2026).
DIY Insulation Cost
The appeal is obvious. You pay for material and nothing else, and you work on your own schedule instead of waiting three weeks for a crew.
The risks are less obvious. Compressed batts and gapped coverage quietly cut real-world R-value, sometimes by a lot, and nobody warranties your own workmanship when something goes wrong two winters later.
Anyone comfortable with how to install fiberglass insulation can knock out a straightforward attic top-up in a weekend. Rigid foam board and small gap-filling with canned spray foam round out the realistic list. Closed-cell whole-cavity spray foam does not belong on it.
Professional Installation Cost
Some materials rule DIY out by themselves. Closed-cell spray foam needs licensed application, protective equipment, and chemical ratios that a homeowner cannot safely hit with rented gear.
What you get for the labor premium is a correct R-value verified on the first pass, no redo, and warranty coverage on both material and workmanship. What you pay is a labor line that often doubles the total bill, plus whatever wait the contractor’s calendar imposes.
Whether is spray foam insulation worth it comes down to one question every time. Does the air sealing benefit justify paying two to three times more than fiberglass for the same job?
How Insulation Installation Works
A contractor follows roughly the same sequence regardless of material. The tools change, the order does not.
Batt jobs run 5 to 12 hours, while spray foam or blown-in work typically finishes in 2 to 5 hours (HomeAdvisor, 2026).
- The crew checks existing insulation depth, moisture damage, and access points
- Gaps around wiring, plumbing, and framing get sealed before any new material goes in
- Batts get cut and fit, loose fill gets blown, or foam gets sprayed, depending on the product
- Packaging and offcuts get bagged and hauled out
- Depth and coverage get checked against the target R-value
Skipping that first step is a common source of comeback calls. A crew that never checks existing conditions can end up trapping moisture instead of solving it, and the homeowner finds out in spring.
Verifying the job afterward sometimes involves a blower door test, which depressurizes the house to measure how much air is still leaking through the envelope.
Air sealing work often includes learning how to install vapor barrier material correctly, since a poorly sealed barrier undercuts the R-value gains from everything above it.
Insulation Cost Payback Period and Energy Savings
Air sealing and added insulation together save homeowners an average of 15% on heating and cooling costs, or 11% on total energy costs (EPA, via ENERGY STAR).
Read that figure carefully. It comes from EPA modeling of a typical existing U.S. home rather than a single case study, so real results shift with climate and with how leaky the house was to start.
Payback depends on material cost, local energy prices, and how under-insulated the house was in the first place. A home going from bare minimum to code-required R-value in a cold climate zone recovers the money faster than a home making a smaller jump somewhere mild, simply because it was bleeding more heat to begin with.
Cellulose and fiberglass tend to pay back faster than closed-cell spray foam on pure energy savings, since the upfront cost per square foot is lower even though R-value per inch is weaker.
Working out your actual payback period for insulation starts with knowing your current R-value, which is where a walkthrough or an energy model earns its keep.
Utility and state weatherization rebate programs shorten payback by cutting the upfront cost instead of raising the ongoing savings. A rebate covering even a quarter of material cost moves the break-even point years earlier without changing anything about the insulation itself.
When a Higher Cost Per Square Foot Does Not Pay Off
More insulation stops paying for itself well before most homeowners expect it to.
Once a home reaches its climate zone’s code-required R-value, additional thickness keeps costing the same per square foot while the energy it saves drops toward nothing.
The math breaks down in a few predictable places.
- Pushing attic insulation past the R-30 to R-38 range that covers warm and mixed climate zones, where the marginal energy saved barely covers the marginal material cost
- Insulating a home that still has major air leaks, since sealing gaps saves more energy per dollar than thicker material laid over a leaky envelope
- Adding depth to a poorly ventilated attic, which traps moisture against the roof deck instead of letting it escape
- Choosing premium spray foam in a space where a code-minimum batt job hits the same target R-value for a third of the price
The Passive House Institute US publishes climate-specific R-value targets that flatten out well below R-60, even for cold northern zones, because the group’s own modeling shows the same diminishing curve.
The U.S. Department of Energy makes the moisture point bluntly. An attic’s biggest enemy is trapped water, and insulation piled over blocked soffit or ridge vents can cause the exact rot and mold problem it was supposed to prevent.
A home energy audit catches this before money gets spent, because it measures where a house is actually losing energy rather than assuming more insulation is always the answer.
Chasing LEED certification for insulation is one of the few cases where spending past the point of energy payback still makes sense, since certification carries resale and compliance value beyond the utility bill.
Once the easy losses are plugged, air sealing and window upgrades usually return more per dollar than another inch of attic insulation.
FAQ on Insulation Cost Per Square Foot
Are There Tax Credits or Rebates for Insulation?
The federal 25C tax credit, covering 30% of insulation costs up to $1,200, expired after December 31, 2025.
State and utility weatherization rebate programs continue in select states, with Massachusetts covering up to 100% of costs for income-qualifying households.
Does Old Insulation Need to Be Removed First?
Not always. Dry, mold-free, undamaged insulation can stay where it is, with new material layered on top to raise the total R-value.
Wet, compressed, or moldy insulation comes out first, since it traps moisture and stops the new layer from performing.
What Tools Does an Insulation Contractor Use?
Batt jobs need a utility knife, a straightedge, and a staple gun. Blown-in and loose-fill work runs through a hopper and hose.
Spray foam requires a heated rig with proprietary chemical tanks, plus respirators and a thermal imaging camera for verification.
How Long Does an Insulation Installation Take?
Batt and board jobs run 5 to 12 hours for an average home.
Blown-in and spray foam move faster, typically 2 to 5 hours, since mechanical application covers more square footage per hour than hand-fitted material.
How Do You Get an Accurate Insulation Cost Estimate?
Start with your current R-value, measured or estimated from a home energy audit.
A contractor walkthrough then confirms square footage, access difficulty, and material choice, which is what turns a rough per-square-foot range into a firm number.
What Should You Insulate First?
The attic, almost always. It carries the lowest cost per square foot and the largest share of a typical home’s heat loss, which is an unusually good combination.
Zone 8 homes, coded to R-49 in the attic, recover 16% in total-house energy savings. That is exactly double the 8% Zone 3 homes see at the lighter R-38 requirement, per EPA modeling of typical U.S. homes.
Before any material gets ordered, the sequence that keeps spending efficient looks like this:
- Audit first, to find where the house actually loses heat
- Air seal second, before adding a single inch of material
- Insulate to the target R-value last, once the first two are done
Turning that order into action starts with knowing how to improve home insulation without overspending on the wrong step first.