
Summarize this article with:
That cold floor you feel every winter morning? Your crawl space is probably to blame.
Understanding what crawl space insulation is and how it works can change your home’s comfort level dramatically. This often-ignored space beneath your floor affects everything from energy bills to indoor air quality.
Most homeowners don’t think about their crawl space until something goes wrong. Moisture problems, freezing pipes, mold growth.
This guide covers the types of insulation materials that work best below your floor, R-value requirements for your climate zone, installation methods, costs, and common mistakes to avoid.
You’ll walk away knowing exactly what your crawl space needs.
What is Crawl Space Insulation?
Crawl space insulation is material installed in the area beneath your home’s floor to control temperature, block moisture, and reduce energy loss.
Most homes with pier and beam foundations have a crawl space. That gap between the ground and your floor joists? It’s either working for you or against you.
Without proper insulation, cold air seeps up through your subfloor in winter. Summer brings humidity and condensation problems.
The thermal boundary between your living space and the outside world includes this area. Ignore it, and you’re basically heating or cooling the outdoors.
Understanding how insulation works helps explain why this space matters so much for your home’s overall comfort.
Types of Crawl Space Insulation
Not all insulation materials work equally well below your floor. Your climate, moisture levels, and budget determine the best choice.
Fiberglass Batt Insulation
The most common option, fiberglass insulation fits between floor joists in pre-cut sections.
Affordable and easy to install yourself. But it absorbs moisture, sags over time, and loses effectiveness when wet.
Spray Foam Insulation
Spray foam insulation expands to fill gaps and creates an air-tight seal.
Closed-cell foam works best in crawl spaces because it resists moisture. Open cell foam absorbs water, so skip it for this application.
Rigid Foam Board

Rigid foam board insulation attaches directly to foundation walls in encapsulated crawl spaces.
XPS and EPS foam boards offer solid R-value per inch of thickness. Great moisture resistance too.
Other Options
Rock wool insulation resists fire and pests better than fiberglass.
Reflective insulation works in hot climates where radiant heat is the main concern.
Benefits of Crawl Space Insulation

The benefits of home insulation extend well beyond just temperature control. Your crawl space affects everything above it.
Energy Efficiency Gains
Uninsulated crawl spaces account for up to 15% of a home’s total heat loss. That’s money literally disappearing through your floor.
Proper insulation means your HVAC system runs less. Lower utility bills, less wear on equipment.
Moisture and Mold Prevention
Ground moisture creates condensation problems. Add a vapor barrier with your insulation to control humidity levels.
Less moisture means less chance of mold growth, wood rot, and structural damage to floor joists.
Comfort Improvements
Cold floors in winter? That’s your crawl space talking.
Insulation creates a consistent temperature throughout your home. No more avoiding certain rooms because they’re always freezing.
Pest Deterrent
Some insulation types discourage rodents and insects from nesting. Encapsulation systems make it even harder for pests to enter.
How Crawl Space Insulation Works
Two main approaches exist: insulating the floor above or insulating the foundation walls below.
Floor Joist Insulation
Traditional method. Batt insulation or spray foam goes between floor joists, directly under your subfloor.
Works with vented crawl spaces where outside air circulates freely. The insulation separates conditioned space from unconditioned.
Crawl Space Encapsulation
Modern approach that treats the crawl space as part of your home’s thermal envelope.
Rigid foam on foundation walls, a sealed vapor barrier on the ground, and air sealing around all penetrations. Vents get closed off permanently.
More expensive upfront but often performs better long-term, especially in humid climates.
The Science Behind It
Thermal conductivity determines how fast heat moves through materials.
Insulation slows that transfer. Higher R-value means better resistance to heat flow through your floor assembly.
Signs You Need Crawl Space Insulation
Some symptoms are obvious. Others take a bit of detective work.
Temperature Problems
- Floors feel cold even with the heat running
- Uneven temperatures between rooms
- HVAC system runs constantly without reaching set temperature
Moisture Issues
- Musty odors coming from below
- Visible condensation on pipes or ductwork
- Sagging or damaged existing insulation
- Standing water or damp soil in crawl space
Energy Bill Spikes
Sudden increases without explanation often point to insulation problems. A home energy audit can confirm the source.
Pest Evidence
Rodent droppings, chewed insulation, or nesting materials mean your current setup isn’t cutting it.
Consider underfloor insulation upgrades alongside pest control for a complete solution.
Vented vs Unvented Crawl Spaces
This decision affects everything else about your insulation strategy.
Vented Crawl Spaces
Traditional building codes required foundation vents to let moisture escape. Insulation goes between floor joists, leaving the crawl space itself unconditioned.
Works okay in dry climates. In humid areas? Those vents actually let moisture in during summer months.
Unvented (Encapsulated) Crawl Spaces
Seal the vents, insulate foundation walls, add a ground vapor barrier. The crawl space becomes part of your home’s conditioned envelope.
Better moisture control and energy performance. The Department of Energy now recommends this approach for most climate zones.
Which Should You Choose?
Humid climate with moisture problems? Go unvented with encapsulation.
Dry climate, tight budget, no current issues? Vented with floor joist insulation still works fine.
R-Value Requirements by Climate Zone
Building codes specify minimum R-values based on where you live. These aren’t suggestions.
Climate Zone Guidelines
- Zones 1-2 (Southern states): R-13 minimum for floors
- Zones 3-4 (Mid-Atlantic, Midwest): R-19 to R-25
- Zones 5-8 (Northern states, Alaska): R-25 to R-30
Foundation wall insulation in encapsulated spaces typically needs R-10 to R-15 depending on zone.
Going Beyond Code
Code is the bare minimum. Higher R-values mean better performance and bigger energy savings.
Energy Star insulation recommendations often exceed local code requirements. Worth considering if you’re already doing the work.
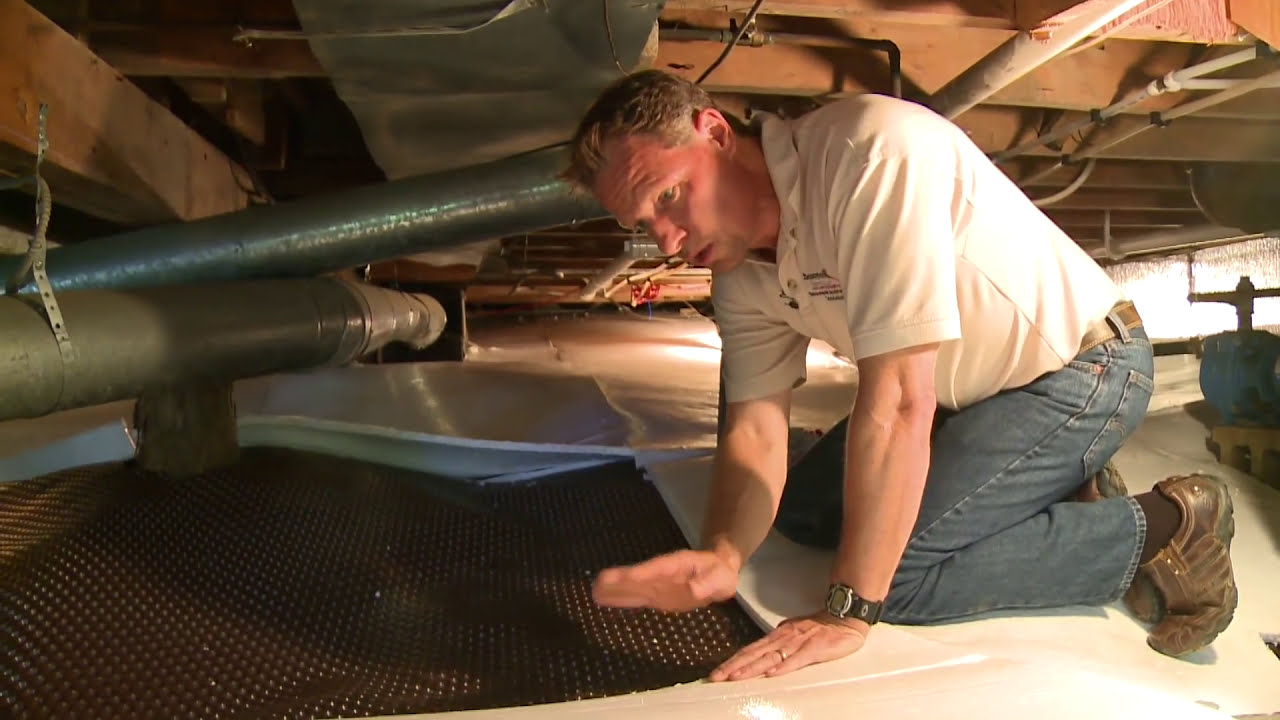
How to Install Crawl Space Insulation
DIY is possible for some methods. Others really need a pro.
DIY-Friendly Options
Blanket insulation batts between floor joists are straightforward if you don’t mind tight spaces and itchy fiberglass.
You’ll need:
- Insulation supports or wire hangers
- Utility knife and straightedge
- Protective gear (mask, goggles, gloves, long sleeves)
- Good lighting and knee pads
Cut batts to fit snugly without compressing them. Insulation compression reduces R-value significantly.
Professional Installation
Spray foam requires spray rig equipment and training. Not a weekend project.
Full encapsulation systems involve multiple components: rigid foam, vapor barriers, dehumidifiers, drainage mats. Hire someone who specializes in this work.
A blower door test before and after installation confirms you’ve actually sealed everything properly.
Crawl Space Insulation Costs
Budget varies wildly based on method, materials, and crawl space condition.
Material Costs
- Fiberglass batts: $0.50-$1.50 per square foot
- Rigid foam board: $1.00-$2.50 per square foot
- Closed-cell spray foam: $1.50-$3.00 per square foot (materials only)
The cost per square foot for insulation increases with higher R-values and better moisture resistance.
Professional Installation Costs
Expect $1,500-$3,500 for basic floor joist insulation in an average-sized crawl space.
Full encapsulation runs $5,000-$15,000 depending on size, condition, and whether you need drainage or dehumidification systems.
Return on Investment
The payback period for insulation typically ranges from 3-7 years through energy savings alone.
ROI on insulation improves when you factor in reduced HVAC maintenance, moisture damage prevention, and increased home value.
Financial Incentives and Rebates
Don’t pay full price if you don’t have to.
Tax Credits
Federal insulation tax credits currently cover 30% of material and installation costs up to certain limits.
Check current IRS guidelines since these programs change frequently.
Utility Rebates
Many power companies offer weatherization rebates for insulation upgrades. Call yours before starting work.
Some states have programs for free home insulation based on income qualifications.
Common Crawl Space Insulation Mistakes
I’ve seen these problems more times than I can count.
Ignoring Moisture First
Installing insulation over existing water problems traps moisture against wood. Recipe for rot and mold.
Fix drainage and grading issues before insulating anything.
Wrong Insulation Type
Paper-faced fiberglass in a damp crawl space fails within a few years. The facing holds moisture against floor joists.
Unfaced batts or foam products handle humidity much better.
Gaps and Compression
Insulation stuffed around pipes and wires loses effectiveness. So does material that’s been compressed to fit.
Take time to cut properly and seal around penetrations.
Forgetting the Rim Joist
That perimeter area where floor joists meet foundation walls? Major source of air leakage if left uninsulated.
Spray foam or cut rigid foam pieces work best here.
Maintenance and Lifespan
Insulation isn’t install-and-forget, especially in crawl spaces.
Regular Inspections
Check annually for sagging, moisture damage, pest activity, or fallen sections. Twice yearly if you’ve had problems before.
A thermal imaging camera reveals problem spots invisible to the naked eye.
Expected Lifespan
- Fiberglass batts: 15-25 years (less if moisture issues exist)
- Spray foam: 25-50+ years
- Rigid foam board: 25-50+ years
When to Replace
Visible damage, persistent odors, falling R-value performance, or major pest infestation all signal replacement time.
Insulation vacuum removal clears old material quickly before new installation.
Crawl Space Insulation for Mobile Homes
Mobile homes have unique challenges. Thinner floors, more exposure to outside air, and often inadequate original insulation.
Special Considerations
The belly wrap (bottom board) must stay intact to protect insulation. Tears let pests in and insulation out.
Wondering about replacing insulation under a mobile home? Budget $1,000-$4,000 depending on size and condition.
Best Materials
Spray foam works exceptionally well for mobile home applications. It seals air gaps and doesn’t sag over time.
Fiberglass batts with proper support straps remain the budget option.
Fire Safety Considerations
Different insulation materials have different fire ratings. This matters in a crawl space with electrical wiring and HVAC equipment.
Material Fire Ratings
Understanding insulation fire rating classifications helps you choose safely.
Mineral wool and fiberglass are naturally fire resistant. Some foam products require thermal barriers when exposed.
Curious whether home insulation is flammable? It depends entirely on the material type and any added fire retardants.
Related Insulation Projects
While you’re focused on the crawl space, consider the bigger picture.
Connected Areas
Insulating basement walls addresses similar moisture and thermal issues if you have both spaces.
Pipe insulation on exposed plumbing prevents freezing and condensation drips.
Whole-House Approach
Crawl space work fits into broader home insulation strategy. Fixing one problem area while ignoring others limits your results.
Learn how to improve home insulation throughout your entire building envelope for maximum efficiency gains.
FAQ on What Is Crawl Space Insulation
What is the best insulation for a crawl space?
Closed-cell spray foam offers the best overall performance. It resists moisture, seals air gaps, and won’t sag over time.
Rigid foam board works great for foundation walls. Fiberglass batts remain the budget-friendly choice for floor joists in dry climates.
Should I insulate my crawl space ceiling or walls?
Depends on your setup. Vented crawl spaces need ceiling (floor joist) insulation. Unvented, encapsulated crawl spaces benefit more from foundation wall insulation.
Wall insulation with a sealed vapor barrier typically performs better long-term.
How much does crawl space insulation cost?
Basic fiberglass installation runs $1,500-$3,500 for average homes. Full encapsulation with spray foam or rigid board costs $5,000-$15,000.
Material quality, crawl space size, and labor rates in your area all affect final pricing.
Can I install crawl space insulation myself?
Fiberglass batts are DIY-friendly if you’re comfortable in tight spaces. You’ll need proper safety gear and insulation supports.
Spray foam and full encapsulation require professional equipment and expertise. Not weekend warrior territory.
What R-value do I need for crawl space insulation?
Climate zone determines requirements. Southern states need R-13 minimum. Northern regions require R-25 to R-30.
Check local building codes for exact specifications. Going higher than code improves energy savings.
Does crawl space insulation help with moisture?
Insulation alone doesn’t solve moisture problems. You need a vapor barrier insulation system and proper drainage first.
Closed-cell foam and rigid board resist moisture better than fiberglass, which absorbs water and loses effectiveness.
How long does crawl space insulation last?
Fiberglass batts last 15-25 years when kept dry. Spray foam and rigid board can exceed 50 years with minimal degradation.
Moisture damage, pest activity, and physical disturbance shorten lifespan significantly.
Is crawl space encapsulation worth it?
Yes, especially in humid climates. Encapsulation controls moisture better than vented systems, reduces energy costs, and protects structural components.
Higher upfront cost pays back through lower utility bills and fewer moisture-related repairs.
What causes crawl space insulation to fall down?
Moisture damage tops the list. Wet fiberglass gets heavy and pulls free from supports.
Improper installation, pest activity, and insulation settlement over time also cause sagging or falling sections.
Should I remove old insulation before adding new?
Usually yes. Damaged, wet, or pest-contaminated insulation should come out completely.
If existing insulation is dry and intact, you can sometimes add new material over it. Inspect thoroughly before deciding.
Conclusion
Now you know what crawl space insulation is and why it matters for your home’s comfort and energy efficiency.
The right approach depends on your climate zone, moisture conditions, and budget. Encapsulation works best for humid areas. Floor joist insulation handles dry climates just fine.
Don’t skip the vapor barrier. Address drainage problems before adding any insulation.
Whether you tackle this as a retrofit insulation project yourself or hire a contractor, the payoff includes lower utility bills, warmer floors, and better protection against structural damage.
Your crawl space affects everything above it. Treat it right, and your whole house benefits.
Start with an inspection. Figure out what you’re dealing with down there. Then make your plan.


